大数据组件-Flume集群部署
1**.规划**三台主机的主机名分别为master,slave1,slave2(防火墙已关闭)由slave1和slave2收集日志信息,传给master,再由master上传到hdfs上2**.配置**上传解压在slave1上的usr文件夹下新建个flume文件夹,用作安装路径[hadoop@slave1 usr]# mkdir flume[hadoop@slave1 usr]# lsbinetc

👨🏻🎓博主介绍:大家好,我是芝士味的椒盐,一名在校大学生,热爱分享知识,很高兴在这里认识大家🌟
🌈擅长领域:Java、大数据、运维、电子
🙏🏻如果本文章各位小伙伴们有帮助的话,🍭关注+👍🏻点赞+🗣评论+📦收藏,相应的有空了我也会回访,互助!!!
🤝另本人水平有限,旨在创作简单易懂的文章,在文章描述时如有错,恳请各位大佬指正,在此感谢!!!
1**.规划**
三台主机的主机名分别为master,slave1,slave2(防火墙已关闭)
由slave1和slave2收集日志信息,传给master,再由master上传到hdfs上
2**.配置**
上传解压在slave1上的usr文件夹下新建个flume文件夹,用作安装路径
[hadoop@slave1 usr]# mkdir flume
[hadoop@slave1 usr]# ls
bin  etc  flume  games  hadoop  hbase  include  java  lib  lib64  libexec  local  sbin  share  sqoop  src  tmp  zookeeper
[root@slave1 usr]# cd flume/
利用Xftp工具将flume压缩包上传到usr/flume文件夹下,解压
[hadoop@slave1 flume]# ls
apache-flume-1.8.0-bin.tar.gz
[hadoop@slave1 flume]# tar -zxf apache-flume-1.8.0-bin.tar.gz
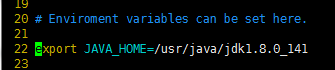
配置flume-env.sh文件
# 进入到conf文件夹下
[hadoop@slave1 flume]# cd apache-flume-1.8.0-bin/conf/
[hadoop@slave1 conf]# ls
flume-conf.properties.template  flume-env.ps1.template  flume-env.sh.template  log4j.properties
# 拷贝出来一个flume-env.sh文件
[hadoop@slave1 conf]# cp flume-env.sh.template flume-env.sh
[hadoop@slave1 conf]# ls
flume-conf.properties.template  flume-env.ps1.template  flume-env.sh  flume-env.sh.template  log4j.properties
# 修改flume-env.sh文件
[hadoop@slave1 conf]# vim flume-env.sh
将java的安装路径修改为自己的

我的是/usr/java/jdk1.8.0_141
配置slave.conf文件在conf下创建一个新的slave.conf文件
#创建
[hadoop@slave1 conf]# touch slave.conf
#修改
[hadoop@slave1 conf]# vim slave.conf
写入配置内容
# 主要作用是监听目录中的新增数据,采集到数据之后,输出到avro (输出到agent)
# 注意:Flume agent的运行,主要就是配置source channel sink
# 下面的a1就是agent的代号,source叫r1 channel叫c1 sink叫k1

a1.sources = r1
a1.sinks = k1
a1.channels = c1

#具体定义source
a1.sources.r1.type = spooldir
#先创建此目录,保证里面空的
a1.sources.r1.spoolDir = /logs

#对于sink的配置描述 使用avro日志做数据的消费
a1.sinks.k1.type = avro
# hostname是最终传给的主机名称或者ip地址
a1.sinks.k1.hostname = master
a1.sinks.k1.port = 44444

#对于channel的配置描述 使用文件做数据的临时缓存 这种的安全性要高
a1.channels.c1.type = file
a1.channels.c1.checkpointDir = /home/uplooking/data/flume/checkpoint
a1.channels.c1.dataDirs = /home/uplooking/data/flume/data

#通过channel c1将source r1和sink k1关联起来
a1.sources.r1.channels = c1
a1.sinks.k1.channel = c1
保存退出将flume发送到其他主机
[hadoop@slave1 conf]# scp -r /usr/flume/ hadoop@slave2:/usr/
[hadoop@slave1 conf]# scp -r /usr/flume/ hadoop@master:/usr/
12
修改master中flume的配置在master的flume的conf文件夹下创建一个master.conf文件
[hadoop@master conf]# vim master.conf
写入配置信息
# 获取slave1,2上的数据,聚合起来,传到hdfs上面
# 注意:Flume agent的运行,主要就是配置source channel sink
# 下面的a1就是agent的代号,source叫r1 channel叫c1 sink叫k1

a1.sources = r1
a1.sinks = k1
a1.channels = c1

#对于source的配置描述 监听avro
a1.sources.r1.type = avro
# hostname是最终传给的主机名称或者ip地址
a1.sources.r1.bind = master
a1.sources.r1.port = 44444
#定义拦截器,为消息添加时间戳
a1.sources.r1.interceptors = i1
a1.sources.r1.interceptors.i1.type = org.apache.flume.interceptor.TimestampInterceptor$Builder

#对于sink的配置描述 传递到hdfs上面
a1.sinks.k1.type = hdfs
#集群的nameservers名字
#单节点的直接写:hdfs://主机名(ip):9000/xxx
#ns是hadoop集群名称
a1.sinks.k1.hdfs.path = hdfs://ns/flume/%Y%m%d
a1.sinks.k1.hdfs.filePrefix = events-
a1.sinks.k1.hdfs.fileType = DataStream
#不按照条数生成文件
a1.sinks.k1.hdfs.rollCount = 0
#HDFS上的文件达到128M时生成一个文件
a1.sinks.k1.hdfs.rollSize = 134217728
#HDFS上的文件达到60秒生成一个文件
a1.sinks.k1.hdfs.rollInterval = 60

#对于channel的配置描述 使用内存缓冲区域做数据的临时缓存
a1.channels.c1.type = memory
a1.channels.c1.capacity = 1000
a1.channels.c1.transactionCapacity = 100

#通过channel c1将source r1和sink k1关联起来
a1.sources.r1.channels = c1
a1.sinks.k1.channel = c1
保存退出
3**.启动测试**
确认防火墙关闭首先启动Zookeeper和hadoop集群,参考hadoop集群搭建中的启动
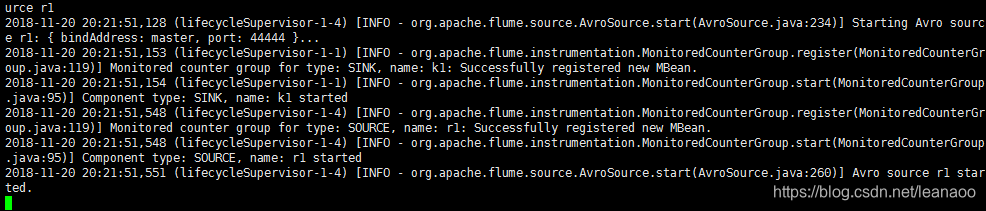
然后先启动master上的flume(如果先启动slave上的会导致拒绝连接)
在apache-flume-1.8.0-bin目录下启动(因为没有配置环境变量)
[hadoop@master apache-flume-1.8.0-bin]# bin/flume-ng agent -n a1 -c conf -f conf/master.conf -Dflume.root.logger=INFO,console
如此便是启动成功
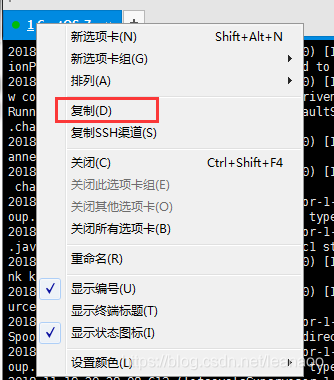
如果想后台启动(这样可以不用另开窗口操作)
# 命令后加&
[hadoop@master apache-flume-1.8.0-bin]# bin/flume-ng agent -n a1 -c conf -f conf/master.conf -Dflume.root.logger=INFO,console &
12
再启动slave1,2上的flume首先在slave1,2的根目录创建logs目录
[hadoop@slave1 apache-flume-1.8.0-bin]# cd /
[hadoop@slave1 /]# mkdir logs
不然会报错
[ERROR - org.apache.flume.lifecycle.LifecycleSupervisor$MonitorRunnable.run(LifecycleSupervisor.java:251)] Unable to start EventDrivenSourceRunner: { source:Spool Directory source r1: { spoolDir: /logs } } - Exception follows.
java.lang.IllegalStateException: Directory does not exist: /logs
	at com.google.common.base.Preconditions.checkState(Preconditions.java:145)
	at org.apache.flume.client.avro.ReliableSpoolingFileEventReader.<init>(ReliableSpoolingFileEventReader.java:159)
	at org.apache.flume.client.avro.ReliableSpoolingFileEventReader.<init>(ReliableSpoolingFileEventReader.java:85)
	at org.apache.flume.client.avro.ReliableSpoolingFileEventReader$Builder.build(ReliableSpoolingFileEventReader.java:777)
	at org.apache.flume.source.SpoolDirectorySource.start(SpoolDirectorySource.java:107)
	at org.apache.flume.source.EventDrivenSourceRunner.start(EventDrivenSourceRunner.java:44)
	at org.apache.flume.lifecycle.LifecycleSupervisor$MonitorRunnable.run(LifecycleSupervisor.java:249)
	at java.util.concurrent.Executors$RunnableAdapter.call(Executors.java:511)
	at java.util.concurrent.FutureTask.runAndReset(FutureTask.java:308)
	at java.util.concurrent.ScheduledThreadPoolExecutor$ScheduledFutureTask.access$301(ScheduledThreadPoolExecutor.java:180)
	at java.util.concurrent.ScheduledThreadPoolExecutor$ScheduledFutureTask.run(ScheduledThreadPoolExecutor.java:294)
	at java.util.concurrent.ThreadPoolExecutor.runWorker(ThreadPoolExecutor.java:1149)
	at java.util.concurrent.ThreadPoolExecutor$Worker.run(ThreadPoolExecutor.java:624)
	at java.lang.Thread.run(Thread.java:748)
#slave1
[hadoop@slave1 /]# cd /usr/flume/apache-flume-1.8.0-bin
[hadoop@slave1 apache-flume-1.8.0-bin]# bin/flume-ng agent -n a1 -c conf -f conf/slave.conf -Dflume.root.logger=INFO,console

#slave2
[hadoop@slave2 /]# cd /usr/flume/apache-flume-1.8.0-bin
[hadoop@slave2 apache-flume-1.8.0-bin]# bin/flume-ng agent -n a1 -c conf -f conf/slave.conf -Dflume.root.logger=INFO,console
1234567
测试
启动成功后(如果没有后台启动另开个窗口继续下面操作)
在slave1的usr/tmp文件夹下新建个test文件
[hadoop@slave1 tmp]# vim test
1
随便写入一些内容
helloworld
test
12
保存退出将其复制到logs文件夹下
[hadoop@slave1 tmp]# cp test /logs/
1
查看master

登录http://(hadoop中active状态的namenode节点IP):50070/explorer.html#

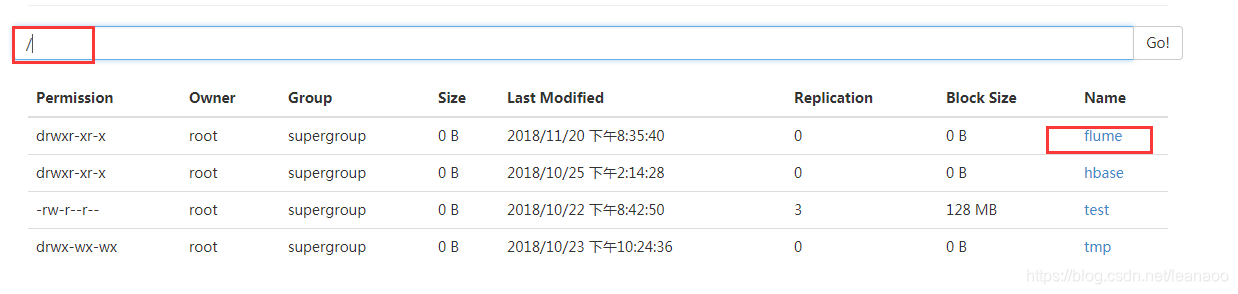

如此便是flume多节点集群搭建完成
4**.注意**
登录查看需要是active的节点地址
在启动slave上的flume前要先建立logs文件夹,也就是flume安装路径/conf下的slave.conf文件中的

监控单个文件到hdfs上
a1.sources = r1
a1.sinks = k1
a1.channels = c1

a1.sources.r1.type = exec
a1.sources.r1.command = tail -F /usr/local/src/hadoop-2.6.0/logs/hadoop-root-datanode-master.log
a1.sources.r1.shell = /bin/bash -c

a1.sinks.k1.type = hdfs
a1.sinks.k1.hdfs.path = hdfs://master:9000/flume/%Y%m%d/%H
a1.sinks.k1.hdfs.filePrefix = log-
a1.sinks.k1.hdfs.fileType = DataStream
a1.sinks.k1.hdfs.batchSize = 1000
a1.sinks.k1.hdfs.useLocalTimeStamp = true
a1.sinks.k1.hdfs.round = true
a1.sinks.k1.hdfs.roundValue = 1
a1.sinks.k1.hdfs.roundUnit = hour
a1.sinks.k1.hdfs.rollInterval = 60
a1.sinks.k1.hdfs.rollSize = 134217700
a1.sinks.k1.hdfs.rollCount = 0

a1.channels.c1.type = memory
a1.channels.c1.capacity = 10000
a1.channels.c1.transactionCapacity = 100

a1.sources.r1.channels = c1
a1.sinks.k1.channel = c1
监控整个文件夹到hdfs
a2.sources = r1
a2.sinks = k1
a2.channels = c1

a2.sources.r1.type = spooldir
a2.sources.r1.spoolDir = /usr/local/src/apache-flume-1.6.0-bin/tmp
a2.sources.r1.fileShuffix = .COMPLETED
a2.sources.r1.fileHeader = true
a2.sources.r1.ignorePattern = ([^ ]*\\.tmp)

a2.sinks.k1.type = hdfs
a2.sinks.k1.hdfs.path = hdfs://master:9000/flume4/tmp/%Y%m%d/%H
a2.sinks.k1.hdfs.filePrefix = GZ-HADOOP-LOG--
a2.sinks.k1.hdfs.fileType = DataStream
a2.sinks.k1.hdfs.useLocalTimeStamp = true
a2.sinks.k1.hdfs.round = true
a2.sinks.k1.hdfs.roundValue = 1
a2.sinks.k1.hdfs.roundUnit = hour
a2.sinks.k1.hdfs.rollInterval = 60
a2.sinks.k1.hdfs.rollSize = 134217700
a2.sinks.k1.hdfs.rollCount = 0

a2.channels.c1.type = memory
a2.channels.c1.capacity = 10000
a2.cahnnels.c1.transactionCapacity = 1000

a2.sources.r1.channels = c1
a2.sinks.k1.channel = c1
单数据源多输出口-hdfs-local filesystem
master.conf:
a1.sources = r1
a1.sinks = k1 k2
a1.channels = c1 c2

a1.sources.r1.selector.type = replicating

a1.sources.r1.type = exec
a1.sources.r1.command = tail -F /var/log/mysqld.log
a1.sources.r1.shell = /bin/bash -c

a1.sinks.k1.type = avro
a1.sinks.k1.hostname = master
a1.sinks.k1.port = 33333

a1.sinks.k2.type = avro
a1.sinks.k2.hostname = master
a1.sinks.k2.port = 44444

a1.channels.c1.type = memory
a1.channels.c1.capacity = 10000
a1.channels.c1.transactionCapacity = 100

a1.channels.c2.type = memory
a1.channels.c2.capacity = 10000
a1.channels.c2.transactionCapacity = 100

a1.sources.r1.channels = c1 c2
a1.sinks.k1.channel = c1
a1.sinks.k2.channel = c2
slave1.conf:
a1.sources = r1
a1.sinks = k1
a1.channels = c1

a1.sources.r1.type = avro
a1.sources.r1.bind = master
a1.sources.r1.port = 33333

a1.sinks.k1.type = hdfs
a1.sinks.k1.hdfs.path = hdfs://master:9000/flume5/%Y%m%d/%H
a1.sinks.k1.hdfs.filePrefix = GZ-LOG-
a1.sinks.k1.hdfs.fileType = DataStream
a1.sinks.k1.hdfs.useLocalTimeStamp = true
a1.sinks.k1.hdfs.round = true
a1.sinks.k1.hdfs.roundValue = 1
a1.sinks.k1.hdfs.roundUnit = hour
a1.sinks.k1.hdfs.rollInterval = 60
a1.sinks.k1.hdfs.rollSize = 134217700
a1.sinks.k1.hdfs.rollCount = 0

a1.channels.c1.type = memory
a1.channels.c1.capacity = 10000
a1.channels.c1.transactionCapacity = 100

a1.sources.r1.channels = c1
a1.sinks.k1.channel = c1
slave2.conf:
a1.sources = r1
a1.sinks = k1
a1.channels = c1

a1.sources.r1.type = avro
a1.sources.r1.bind = master
a1.sources.r1.port = 44444

a1.sinks.k1.type = file_roll
a1.sinks.k1.sink.directory = /usr/local/src/apache-flume-1.6.0-bin/flumelcal

a1.channels.c1.type = memory
a1.channels.c1.capacity = 10000
a1.channels.c1.transactionCapacity = 100

a1.sources.r1.channels = c1
a1.sinks.k1.channel = c1
监控一个文件下的日志文件,缓冲通道使用file,指定文件夹checkpoint
a1.sources = r1
a1.sinks = k1
a1.channels = c1

a1.sources.r1.type = exec
a1.sources.r1.command = tail -F /usr/local/src/hadoop-2.6.0/logs/*.log
a1.sources.r1.shell = /bin/bash -c

a1.sinks.k1.type = file_roll
a1.sinks.k1.sink.directory = /usr/local/src/apache-flume-1.6.0-bin/data_resources/save_data

a1.channels.c1.type = file
a1.channels.c1.capacity = 1000
a1.channels.c1.transactionCapacity = 100
a1.channels.c1.checkpointDir = /usr/local/src/apache-flume-1.6.0-bin/checkpoint
a1.channels.c1.dataDirs = /usr/local/src/apache-flume-1.6.0-bin/data

a1.sources.r1.channels = c1
a1.sinks.k1.channel = c1

永洪科技,致力于打造全球领先的数据技术厂商,具备从数据应用方案咨询、BI、AIGC智能分析、数字孪生、数据资产、数据治理、数据实施的端到端大数据价值服务能力。
更多推荐


 1
1 0
0- 0


 已为社区贡献2条内容

所有评论(0)